Image (photo) forensics
15 feb. 2013In this lecture we looked at what role equipment and settings have on digitizing analogue information for usage in digital investigations. Here are some of the important principles
Cameras and scanners are common when digitizing analogue documents, but other techniques exists like laser scanners measuring the distance traveled and can be used for making a 3-dimensional model.
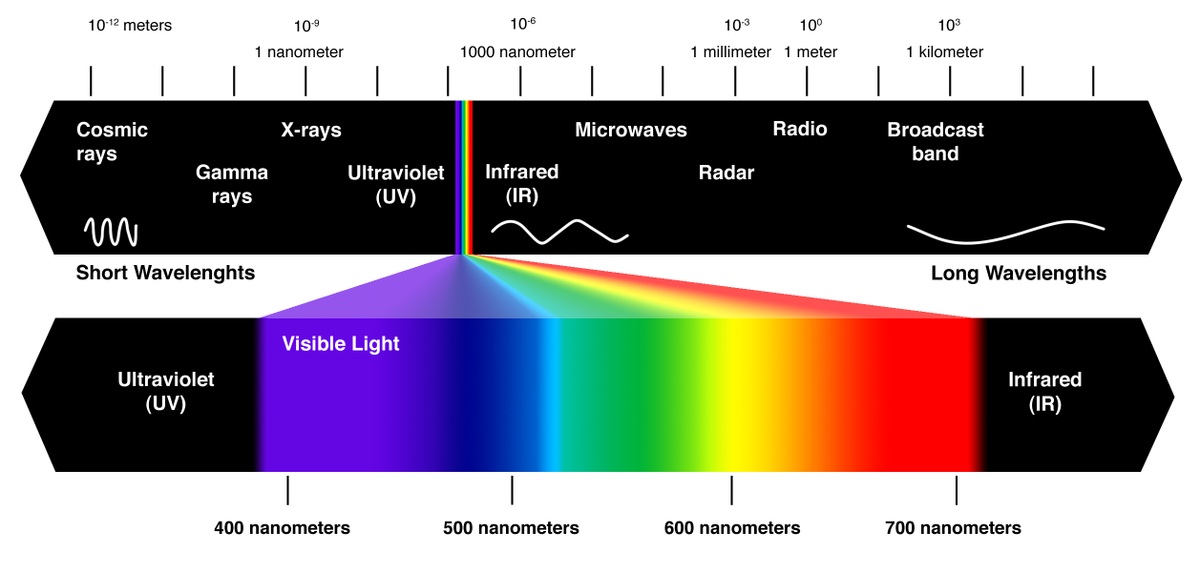
Cameras and scanners work by sampling the light based on tree colors: red, green and blue (RGB) and the color represented on your screen is a combination of them all. 24 bit storage is the most common giving 8 bit to each channel. A color channel can then be represented by a value between 0 and 255. If all 3 channels are 0, then we display black, and when all channels are 255 we get bright white. The reason for separating the visible spectrum in tree parts like this is probably because it's easier than having dedicated hardware recognize the actual wavelength. In the chip, these 8 bits or 256 possible values are separated based on light intensity. RGB is the most common color space, but there exists other like Hue/Saturation/Value (HSV) and when printing (on while, as compared to black on displays) CMYK (cyan magenta yellow + black) is used. Transforming between them and making sure print, monitor and projection look the same is a dedicated research field. Mapping between color spaces or gamuts (subsets of the entire possible set of colors) can lead to skewed color distributions (too much yellow, or too little etc). One important takeaway is Calibration of the capture and display device.

(source: deserthighlandspr.com)
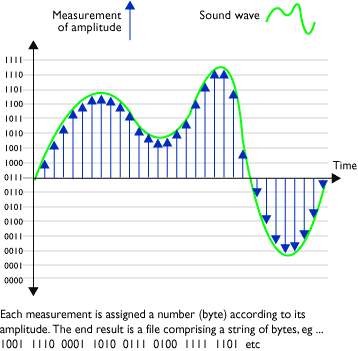
(source: commons.wikimedia.org, flossmanuals.net)
Back to the camera, the sensor chip (in digital cameras) consists of a grid of small individual sensors and the number of them determine the resolution (digitizing) Resolution can be measured in pixels height times width and in dots per inch (in one direction) (DPI). Dots per inch makes most sense when using a scanner because the distance is always the same to the target. DPI is also common on screens and devices for the same reason. You can always move closer or further to the display adjusting the sampling your eyes get from the image the same way you can with a camera. 300 DPI or more is preferable when scanning. Humans can see about 5 lines per mm, and 300dpi equals about 12 lines per mm. A microscope on 100x amplification is about 500 lines per mm. Also, it is possible to buy more expensive 3 chip sensors devices that process RGB separate instead of side by side, and it gives less cross talk (less noise).
One important thing when digitizing is to keep the information when storing it. JPG is a lossy file format, meaning it will remove details in order to store less information. A method called indexed colors is commonly used in GIF, using a plate of predefined colors. This destroys the fine details required for hand written recognition and similar techniques that depend on the tiny variations in the data source.
Cameras often come with zoom capability. It's very important to distinguish between optical zoom and what's often called digital zoom. Optical zoom is when physical lenses are used for making a smaller or wider area of light hit the image sensors and is generally a good thing. The more optical zoom you use, the more light you depend on in general, affecting the shutter time (time from start to stop of capturing of signal for the current image). Digital zoom is when the computer makes each pixel bigger, resulting in more blur. It does not add any additional information and is generally a bad thing and should be avoided at the capturing stage. It is recommended to play with some tools like Gimp, Photoshop or imageJ (library) to get a feeling for simple image editing.
Digitizing a crime scene allows for objective discussion related to the factual happenings later on. When talking of editing, another interesting aspect of forensics related to images is image manipulation. It was mentioned briefly in Digital Forensics I. It can be as simple as changing meta data (date taken, location) and it can be directly on content. Remove a person, add an item etc. Hackerfactor.com/blog is a page dedicated to detecting image manipulation and has a lot of interesting techniques.
Interesting areas of research are sensor identification (does this image belong to this camera? using meta data, small damages to objective (glass), small differences between the same model etc).
Another important aspect is protecting the validity of this kind of evidence, and can be done my watermarking. Like adding the time stamp to the image instead of only in the meta data. Related is stenography (digital watermarking), hiding information inside the noise of an image.
Lastly we discussed VISAR (Video Image Stabilization and Registration) which is an image stabilization technique using many frames to average out noise and disturbances. This technique can also be used to enhance a dark image from video (adding frames) and in some cases with linear movement add some more resolution to an image. Some movies have this cool animation where they can just zoom in as much as they want and "enhance" the image to make it clear. This is of course not possible if the original source is bad. No magic here.
The part about audio was not walked through, but the principles are basically the same. We sample both in time and "volume". Typical sample rates are 44000 samples per second (CD) using 16 bit precision. Things audio can be used for is filtering out background noise to determine localizational clues (like in the movies), detecting what kind of room the recordings were done in (acoustics), type of microphone..

(Source: planetoftunes.com)

